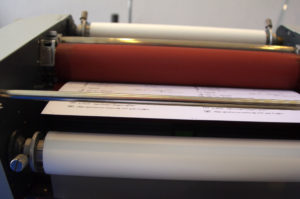
How to use a Comb Binding Machine
How to Use a Comb Binding Machine to Create the Perfect Book
Plastic combs have steadily become one of the most popular and economic ways of binding a book, presentation or project.
Troubleshooting binding machine problems shouldn’t be the end of the world. The machine itself is actually very fun to use once you get the hang of binding your own books.
There are a number of comb binding systems on the market (you can view the best comb binding systems here). The Explorer 24” Manual Comb Binding Punch & Closer Combo, is incredibly user-friendly, allowing first-timers and veterans alike to easily adjust margins and get sleek binding results.
This guide will cover its many parts and how to use its features to get the most bang for your comb-binding buck.
Getting To Know the Parts of a Comb Binding Machine
Many models use the same standard features to get the job done. You should familiarize yourself with each of them before you begin binding your own books.
The Punch
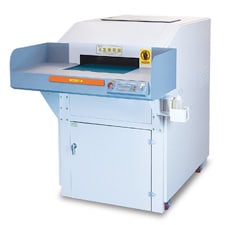
Almost all comb binding systems will have a punch, either electronic or manual, that punches holes through your entire project.
The Comb Binder
In terms of binding, there is also almost always a lever on the comb binder. Quite simply pull the lever which opens the plastic combs. This allows you to load the punched pages. Then close the comb around it.
Margin Control
Most comb binding systems have margin control knobs or dials. Some systems will also have a depth of margin control knobs that allow you to change the margin size according to size of project.
Measuring Tools
Many comb binding systems will have measuring tools that will help you choose the right size comb for the thickness of your specific book. This will vary based on the type of paper and number of pages you use.
Waste Bin
Since the chips must fall somewhere when you punch, a waste bin is built into the machine. On most models, you will find this bin located just underneath the flat level surface. Be sure to clean this section out periodically or your hole punch could get backed up.
How To Make The Perfect Comb-Bound Book
Now for the good part, actually using your Comb-binding machine!
Punching the holes
First of all, you’ll want to start with a test sheet that is the same size as the sheets in your book to set your margins.
Place your sheet into the machine and align the sheet with the margin guide. After you punch the sheet fold it exactly in half along your binding edge. You want to make sure you don’t have any holes extending past the edge of your page and that the holes allow for an even top and bottom margin.
If necessary, move the margin guide to the left or right so that your top and bottom hole are lined up and you have even margins to the edge of the paper when folded. This provides a frame of reference before you punch the pages of your actual document.
Pro tip: You may have to disengage a die punch pin. This can prevent holes from punching off the end of the page with odd sized documents.
For units that have depth margin control, you will want to use the guide provided with the unit to determine when to change the depth margin. Some machines allow you to change the depth from the edge of the sheet to the punched hole. The punch can start deeper for thicker books to prevent the risk of pages tearing out. You cannot do a deeper margin for thinner books, because your pages will not have room to turn inside your binding comb.
If you do a deeper margin for a thick book, it is recommended to change back to the thinner margin when you are done. This is especially important, if you only bind with one size binding edge, but the thickness of your documents varies between thin and thick books.
Pro tip: Use this time to coordinate the exact margin depths and alignment you want.
Once the margins are aligned, you can begin punching.
Check your own machine’s manual to get a sense of the official recommended number of pages you should punch at once. For the Explorer model, you can comfortably punch anywhere between 15-17 pages of 20lb bond paper at a time.
Pro tip: In cases of thick clear or plastic covers, you may want to punch them one at a time, as they can put more wear on a punch. These are a denser material than paper or cardstock
This is also where an automatic puncher vs. a manual puncher will come into play. Your capacity to create as many books as you can will be impacted by the type of machine you’re working with; manual being less efficient than the electric version.
Binding the book
Now we’re onto the binding section of creating your perfect comb-bound book.
First, you’ll need to select your comb. During this part, you’ll use the built-in measuring tools to ensure you get the right size comb for the thickness of your book.
Slide your book underneath the measuring tools and align them with the pages, then select a comb size that corresponds with the measurement. This will set the width for your book so that the comb-binding fits perfectly.
Pro tip: Do not squeeze your pages tight when determining the size of your comb, you want them the same thickness they would be lying naturally after being bound.
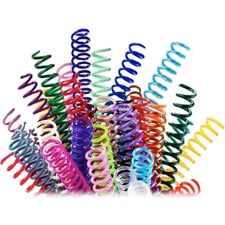
After you select your comb, you feed it onto the teeth of the comb opener, with the open end of the rings facing you. Use the lever on the machine to open the teeth of the comb allowing room to add your pages.
At this point, take your book and feed the punched holes through the teeth of the comb. This section can be a little tricky, so be patient and gentle – you don’t want to rip any edges of your cover before you even get the comb binding on!
Pro tip: If you have a thick book, feed the pages onto the comb in smaller sections.
Now adjust the lever to close the teeth of the comb back around the book.
Congratulations!
You have created a perfect comb bound book. These will come in handy for any miscellaneous books, presentations or projects.

