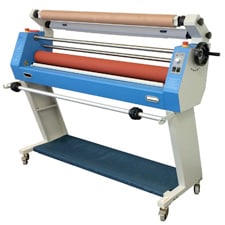


How to Operate Hot Roll Laminators
Because hot roll laminators are more expensive at first, they are typically used by those who laminate large items such as posters or signs on a regular basis, or who laminate a large number of items in the same run such as printing shops, schools or corporate offices. The higher initial cost is offset by the heated roll laminator’s time efficiencies as well as the cost efficiencies of bulk laminating.
Hot roll laminators, as opposed to pouch laminators, utilize two rolls of laminating film mounted on spindles (known as mandrels) that pass through the laminating machine and over two heated rollers. The documents to be laminated are run through the nip opening (the space between the two heated rollers), which activates the adhesive on the film fed over them and causes the film to adhere to the documents. Because roll laminators produce finished objects in one continuous sheet, they must be manually cut apart with scissors, trimmers, or cutters. Be sure to leave a 1/8″ – 1/4″ sealed lip around your document to ensure a proper seal.
Read the User Manual
When setting up your heated roll laminator or changing out your film, carefully read the user manual that came with your laminating machine and follow the guidelines correctly. Your manual will provide detailed directions for threading your machine, regulating heat and tension, and controlling the speed to achieve the best results. If you obtain bad results, the first thing you should do is consult your user handbook to ensure that everything is properly configured.
Consider the Following
As previously stated, your user manual will describe how to thread the laminating film through your machine. You should carefully follow those guidelines. However, here are some general points to get you started:
- Do not let your top or bottom film rolls run out entirely while the opposite roll is still running, as this will cause the heated roller to pick up adhesive from the remaining film roll.
- Turn off your machine and allow it to cool completely before replacing your film.
- Position the film such that the coarse (or dull) side is away from the heated rollers or heat shoes; the coarse side includes the adhesive, which you don’t want in direct contact with your rollers.
- After loading your film rolls on the mandrels, close and lock them if needed for your unit. Also, make sure the film is correctly guided under the idler bars and your top and bottom roll line up evenly on the left and right side.
- Insert the first several feet of your film into the nip using your threading card or a stiff piece of chipboard. Once again, consult your user manual for exact instructions. When your film is completely threaded, turn on your machine, heat it up and get started!
Monitor the Tension
While the tension on your laminating machine should not need to be adjusted frequently, wrinkles on the top or bottom film, straining, or edge curls may signal the need for tension adjustments. Curls occur when the top and bottom tensions are unequal; the film will normally curl in the direction of the tighter tension setting. If your film curls downward, your bottom tension is set too high. Check your top tension if your film is curling upward. In general, film tension follows the “less is more” principle: employ just enough tension to not see any wrinkles as it goes over the heated rollers or heat shoe, but not so much that the heated film stretches out.
Adjust the Temperature
If the temperature settings on your heated roll laminating machine aren’t appropriate for the type of film you’re using, your items may develop wrinkles or bubbles. If the temperature is too low, it will appear hazy and pull off your document; if the temperature is too high, you will get waves or ripples, known as “heat wrinkles,” as well as probable wrinkles and bubbles.
Trim Carefully
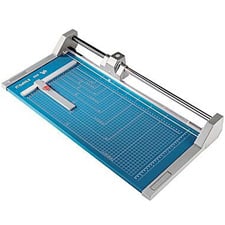
When trimming down your laminated materials, leave at least a 1/8″ border around each edge to allow the film to stick both to itself and to your paper, keeping your item clean from dirt, debris, and fluids. It will also assist in preventing the film from rolling back and separating from your document, which can happen if the border is insufficient. If all of the cutting and trimming becomes too much for you, consider obtaining a zippy cutter or a rotary trimmer to make the job faster and easier. You may also want to consider using a corner rounder to round the corners of your documents, both to avoid pointed edges and to keep the corners from pulling away due to wear.
Keeping Clean
As you use your hot roll laminator, you may see that adhesive has built up on your rollers, leaving unappealing bumps on the materials you’re laminating. Excessive build-up can lead to uneven roller pressure and improper sealing. To keep your rollers clean, we recommend using denatured or isopropyl alcohol and a clean soft cloth (lint-free) to remove any excess adhesive left behind, after letting them cool completely first.
Contact Filmsource, Inc today regarding all laminating roll requirements, we offer a wide variety of laminating equipment and materials.

")
")

")
